How-to: The Daily Desi (Indian Makeup Look)
The Daily Desi (Indian Makeup Look)
Hello, beauties....and welcome back to our blog for yet another bomb look to make you shine! 💮
This week's blog is gonna be on a very Indian Makeup look for those brown skinned beauties out there! 💄
From golden eyelids to smoking red lips...let's look at how we created this look that is preferred by our Indian sisters 💟Here is a glimpse of The Daily Desi :


And not to forget, these are the products we used to achieve this look:

So lets get to the steps to create this look 💌 We have also attached a tutorial video at the end of this blog for your better understanding!
Step 1 : Prep and Prime!
~ Primers are very important as a first step for any makeup look at they provide a smooth canvas to apply your makeup, cover appearance of pores and make your makeup long lasting.
~ Apply your primer with a foundation brush with downward strokes following your facial hairline
~ In this tutorial, we used the Mary Kay liquid foundation brush and the amazing Mary Kay Foundation Primer SPF 15
Step 2 : Build your Base!
~ Now that the canvas is ready, time to paint: Foundation!
~ Apply your foundation the same way you applied the primer
~ Make sure the color of foundation suits your skin tone
~ In this video, we're using the Mary Kay Timewise Matte-wear Foundation in shade Bronze 1
~ This is a shade that suits brown skin and give a matte look that is preferred by most indians


Step 3: Cover and Conceal!
~ Now, time to cover those imperfections!
~ An imperfection that almost everyone has: dark undereye circles
~ Solution: Concealer
~ In this video, we used Mary Kay Perfecting Concealer in shade Light Beige
~ Place the concealer under your eyes in dots and Dab and blend the concealer well with your foundation brush. You may use your fingers if you prefer.

Step 6: Line those lids!
~ One word: EyelinerIndians LOVE eyeliners, kajals and kohlsFor this look, we used the Mary Kay Gel Eyeliner that comes in a pot together with an expandable brush

~ Make your eyes pop out with voluminous and length lashes
~ In this video, we used the brand new Mary Kay Lash Intensity Mascara that gives some serious volume and bold lashes


Hello, beauties....and welcome back to our blog for yet another bomb look to make you shine! 💮
This week's blog is gonna be on a very Indian Makeup look for those brown skinned beauties out there! 💄
From golden eyelids to smoking red lips...let's look at how we created this look that is preferred by our Indian sisters 💟Here is a glimpse of The Daily Desi :


So lets get to the steps to create this look 💌 We have also attached a tutorial video at the end of this blog for your better understanding!
Step 1 : Prep and Prime!
~ Primers are very important as a first step for any makeup look at they provide a smooth canvas to apply your makeup, cover appearance of pores and make your makeup long lasting.
~ Apply your primer with a foundation brush with downward strokes following your facial hairline
~ In this tutorial, we used the Mary Kay liquid foundation brush and the amazing Mary Kay Foundation Primer SPF 15
Step 2 : Build your Base!
~ Now that the canvas is ready, time to paint: Foundation!
~ Apply your foundation the same way you applied the primer
~ Make sure the color of foundation suits your skin tone
~ In this video, we're using the Mary Kay Timewise Matte-wear Foundation in shade Bronze 1
~ This is a shade that suits brown skin and give a matte look that is preferred by most indians


Step 3: Cover and Conceal!
~ Now, time to cover those imperfections!
~ An imperfection that almost everyone has: dark undereye circles
~ Solution: Concealer
~ In this video, we used Mary Kay Perfecting Concealer in shade Light Beige
~ Place the concealer under your eyes in dots and Dab and blend the concealer well with your foundation brush. You may use your fingers if you prefer.


~ It is important to prime your eyelids just like how you primer your face so that all kinds of eye makeup stays intact and long lasting
~ In this video, we're using the Mary Kay Eye Primer
~ In this video, we're using the Mary Kay Eye Primer

Step 5: Smokey Golden Eyes
~ We use Mary Kay mineral eye color in shade Amber Blaze to give the golden look
~ Cover the corner and entire middle of the eyelids with golden eyeshadow
~ Next, to give the smokey effect, add black eyeshadow at the corners of the eyelids and BLEND BLEND BLEND both colors (We used the Mary Kay mineral eye color in shade Brilliant Black)
You may refer to the video for more clarity


Step 6: Line those lids!
~ One word: EyelinerIndians LOVE eyeliners, kajals and kohlsFor this look, we used the Mary Kay Gel Eyeliner that comes in a pot together with an expandable brush

Step 7: Mascara Mystic
~ Make your eyes pop out with voluminous and length lashes
~ In this video, we used the brand new Mary Kay Lash Intensity Mascara that gives some serious volume and bold lashes

Step 8: Blush and Highlight Away!
~ Give yourself some rosy cheeks while adding color and clarity to your face
~ Highlighting makes your features look more brilliant and sharper
~ For this tutorial, we used the amazing Mary Kay Cheek Color Duo in Juicy Guava
~ It comes with a warm coral blusher in an orange tone that suits brown skin AND it has a soft, golden pearl highlighter so you don't have to get a separate one
~ Swipe the blusher onto your cheeks and add some highlighter to the cheekbones to make your face glow
~ Don't forget to swipe some highlighter on your nose bone and cupid's bow for extra oohhmmphhh

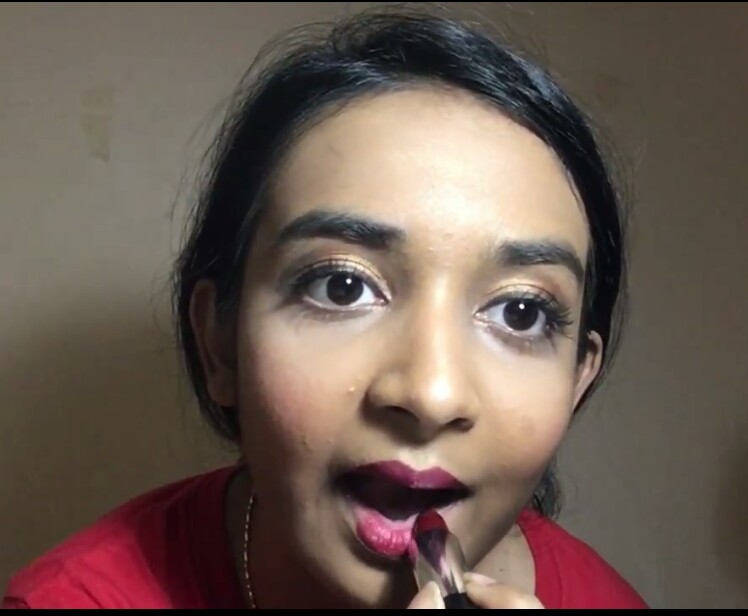
Step 9: Perfect Pout! ~ Only two words: RED LIPSTICK, something that has always been an all-time indian favourite~ We use the brand new launched Mary Kay Gel Semi-shine Lipstick with Cushion Matrix Technology in the shade Scarlet Red (seriously makes those lips pop! 😍 )
Step 10: The Indian Bling! 💖
~ Show the 'desi' in you with some indian accessories and most importantly the BINDI ~ We used some gorgeous elephant shape earrings (Elephants: another very indian thing) and we opted for a simple black dot bindi although you can always use colorful and sparkly ones!

Final Step: Finish it off!
~with some makeup finishing spray to keep everything long lasting and in place!
~ Make sure you spray from at least a 15 cm distance to avoid over-moisturisation and prevent the spray form getting into your eyes and nose
~ Spray twice in a 'cross' or X- shape (Refer to video for more clarity)
~ We used Mary Kay's Makeup Finishing Spray by Skiindinavia

AND WE'RE DONE!
Here's the Daily Diva:
Here's the Daily Diva:

And here's our YouTube video for better understanding:
Hope you find this helpful and manage to create your own Daily Desi 🎕⚘
Hope you find this helpful and manage to create your own Daily Desi 🎕⚘


Comments
Post a Comment